
The Leader's Guide to Video Conferencing, Part 1
Welcome to You TV.
The global pandemic has forced many of us into our homes to work remotely, where all of our meetings take place on the phone or in video conferences. You’re on camera and speaking into a microphone more than ever and, more often than not, you’re doing it wrong.
When you went to the office or met with partners or customers, did you wear business clothes suitable for the context? Did you comb your hair? Shower? Shave?
Of course you did. That’s what it takes to create your desired net impression among your co-workers, peers, management and customers.
Why wouldn’t you be concerned about creating a desired net impression when working remotely?
Firstly, that means proper clothing and grooming (even if it’s only above your waist). That should be a given.
But if you want to do it right, you need to learn how to produce You TV.
There’s a reason that talking heads on TV or interview subjects appear in a certain way. Directors and producers want an interesting background for each subject to create interest and to eliminate distractions that may draw the viewer’s eye away from the subject. They want consistency of video quality, especially between cameras. They want subjects that are properly and consistently lit and, most importantly, they want those subjects to be properly heard.
Every time you get on a video conference, you’re on You TV.
I don’t expect you to create a professional studio in your home with all the gear and planning that may require, but I do expect you to look like a leader and sound like a leader when you’re working with others using video communication.
Here are some easy and inexpensive things you can do to up your game.
The Basics
- Frame yourself
- Compose an orderly background
- Place your webcam at eye level
- Place your brightest light source in front of you
- Wear a headset with a good microphone
Let’s break these down with some help from the tweets of Room Rater. 😉
Frame Yourself
How do you want to be viewed? Are you in a working meeting, where you need access to your computer keyboard, or are you just having a conversation?
If you’re in a working meeting, you’ll probably need to be near a solid surface, so you can type or share your screen. In that case, frame yourself about an arm’s length from your camera.
If you’re just having a conversation, you might want to sit in a comfortable chair or on a couch, perhaps displaying a bit more than your head and shoulders.
In that case, you’ll have to experiment with the placement of your camera in your environment to see how you appear in your frame.
Love the blue. Want the chair. Pro San Pellegrino. 9/10 #RichinaBicette pic.twitter.com/EJFlzqxKbZ
— Room Rater (@ratemyskyperoom) December 10, 2020
Compose an Orderly Background
Where in your home are you working?
You may have never worked at home before. You may never have even considered it, so you didn’t plan for it. Perhaps you live in an apartment, maybe even with roommates. Or maybe you have a growing family and don’t have any spare rooms to use as a home office. You might not even have room for a desk.
That’s OK, you can address almost all of the above, and more.
When framing yourself, be sure to check behind you for clutter or choppy backgrounds. Don’t be afraid to move things around - your chair, other furniture, art, computers, printers - even people. (Asking your roommate or spouse to sit somewhere else is just fine.)
At least you got the 10/10 https://t.co/5IQsGrlL56
— Room Rater (@ratemyskyperoom) December 8, 2020
If your background is a blank wall, shine a light on it to create the appearance of depth.
Camera Placement
Laptops are great but during typical use, you’ll be looking downward in your camera shot.
Will not make room of year. Raise camera height about a foot. Reframe. 4/10 @BenGoldberger pic.twitter.com/nE9P4ygQm0
— Room Rater (@ratemyskyperoom) December 10, 2020
No one wants to know the color of your ceiling and they certainly don’t want to look up your nose.
If you have to use the webcam built into your laptop, position the camera so that it is at eye level. If you have to type or manipulate your screen, use an external keyboard and mouse.
Placing your laptop on a table or desk on top of a stack of books works great.

The Basics of Lighting
Good angle. Bust of Jefferson. Twigs. Natural lighting needs tamping down. 8/10 @agordonreed pic.twitter.com/j71PP4YsUt
— Room Rater (@ratemyskyperoom) December 11, 2020
- Place your brightest light (Wikipedia: key light) in front of you. This can be a lamp behind your computer or even a window. It’s best to diffuse the light with a sheer curtain or shade so that it isn’t harsh and doesn’t over expose your face.
- Use background lighting (Wikipedia: fill light). This could be a lamp across the room or track lighting aimed at a wall. Again, this shouldn’t be too bright as to distract the viewers eye or create imbalance in the frame, but bright enough to create some depth.
Pro Tip: Do your current surroundings make it difficult to get good lighting in front of you? Place your video conference window in the center of your screen, just below your camera. Open a word processor to a blank white page and move it to the left of the conference window. Do the same for the right side, then crank up the screen brightness to its highest level. It’s not as good as a true key light, but it works remarkably well. If your operating system supports it, also turn off Dark Mode.
How NOT to light yourself
This is me in what looks like a proof-of-life photo from a kidnapping. Notice the fill lighting on the wall to the right of the frame (good) but also the light coming from the window with the shade up on the left of the frame (bad). The right side of my face is completely over exposed.
In an ideal world, I could just turn my desk toward the brightest light source (the window) but since my desk is in a fixed position, I have to learn to control it.
A Simple Fix
The shade in my office is of the up-down variety, meaning you can allow light into the room from the top or the bottom. Raising the lower part of the up-down shade diffuses the light, making it softer but still allows light above my head, onto the wall. (But probably still a bit too much on my forehead.) Still, it’s better than before. I could also close the blackout curtains so that there would be almost zero light coming from the window, then add a light in front of me and a second fill light on my other side.
Sound
Now that you look good, you need to sound good. People need to hear you clearly and the way to accomplish that is NOT to use the microphone and speakers on your laptop. Yes, some are OK, but trust me on this, most are not.
Pro post it note. Plants. Reposition slightly. Not factor in rating but headphones a distraction. 9/10 @GoDragonsAD pic.twitter.com/aclMexppfI
— Room Rater (@ratemyskyperoom) December 12, 2020
The easiest solution is to use a headset with a good quality microphone. Yes, the headset will appear in the shot, but it’s better than the alternative: good video with horrible audio. In fact, it’s been said many times that good audio is more important than good video. I tend to agree.
Well composed. Window. Chest. Art. Pillow. Plant. 9/10 @BumillerNYT pic.twitter.com/tBlBydmqCl
— Room Rater (@ratemyskyperoom) December 10, 2020
If you don’t like a set of “cans” protruding out the sides of your head, use earbuds. Ever since they were first released in 2007, the microphone on the Apple Earpods has been outstanding. It’s especially good when you consider that they used to be included in the box for free. (I probably have half a dozen pairs around the house.) They’re comfortable to wear and if you don’t already own a pair, you can pick them up for under $20. The cable is a little short but you can fix that easily with a 3.5mm TRRS extension cable. (Make sure it’s TRRS, not TRS.)
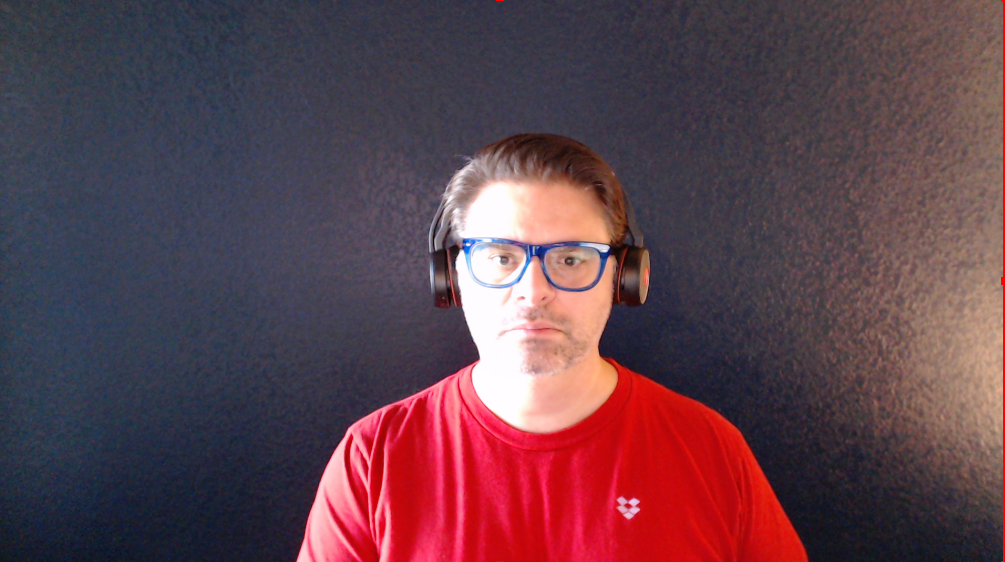
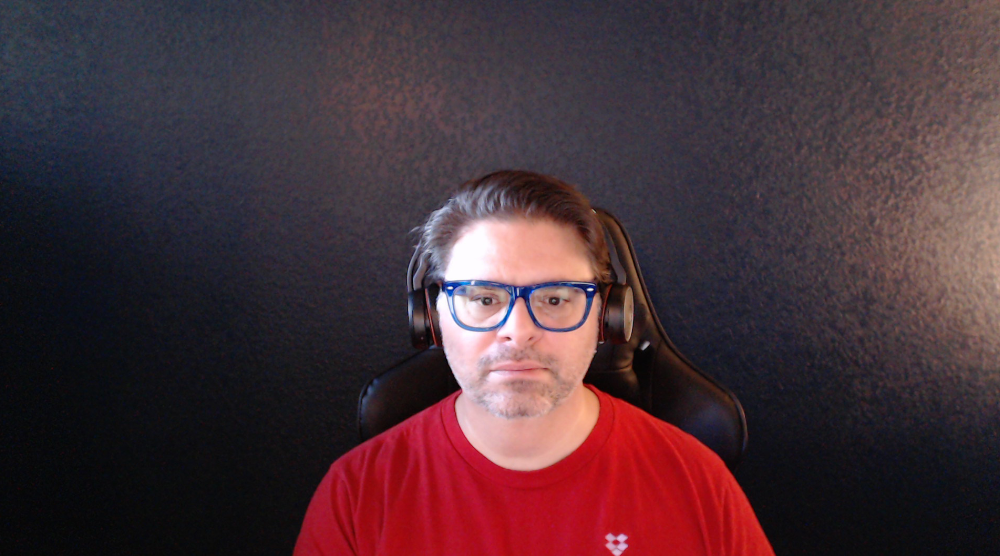
Bluetooth headphones will also work and you get the added bonus of not having any exposed wiring. My favorite pair of everyday Bluetooth headphones are the Sony WF-1000XM3. They sound amazing and the microphones are very good, but they don’t look very good on camera. Case in point:
Great detail. Globe. Models. Whimsy. May need new plant. 9/10 @RyanPatelGlobal pic.twitter.com/PoJhjQyt9M
— Room Rater (@ratemyskyperoom) December 8, 2020
Many people I work with use Apple Airpods. The stem on each earbud that points down toward your mouth is a little distracting for viewers at first, but I’ve gotten used to seeing them. Most importantly, they have very good mic quality.
Room Rater Holiday Update. @PhilipRucker’s decorated room is enjoying lots of sunlight and on air plaudits. 10/10. pic.twitter.com/UyRKIpxuFw
— Room Rater (@ratemyskyperoom) December 11, 2020
Leveling Up
How can you shift your video conferencing from good to great?
Stay tuned for Part 2 of this guide.